Pictures of your DIY lights - Post your pics!!!

dandyrandy

Well-Known Member
The inside work was done through the end holes and the large fan holes on the top.
I will admit that it was a big time pain, but that's just because it was a first pass effort and I wasn't really that smart about it.
Next time I would take measurements from these and then do the difficult parts outside of the vinyl. I would then slide the whole internal assembly into place and add bolts where needed.
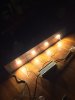
I've been running 2 5" fenceposts with 4 Vero 29s each for a year or so. I used a 4" holesaw to cut the holes in the top. I used a 4" adaptor that has a flange and mounted it in the center. I have 2 so I used a Y and have the carbon filter blower pull around 80cfm through them. I have a sail switch so if I loose the blower the lights won't come on. Really solved the heat issues. I can run 800 watts in around 12sq ft enclosed with only 80 cfm of air.
 

Growmau5

Well-Known Member
I'm probably jumping the gun by posting pics of this project before it is done. It is simply an aluminum plate that will replace the glass in a Raptor 8" HPS hood. It will house ( 8 ) cxb3590 36v @ 1400ma and is basically a complete rip off of Johnson Growlight's CXB8 model.
**don't worry @Stephenj37826 I have zero interest in taking this to market and stealing your IP. this is simply a fun project for a friend.

The project was conceptualized in Adobe Illustrator, G code came from V-carve, and cutting took place on a ShopBot CNC machine. I need a special bit to finish the metal plate to look like the wooden test board.

This is a test fixture, so thermocouples will be used in event of failure. But what do u guys think? will the arctic alpine 64 plus handle the heat load enclosed in a hood? should I add some baffling to channel the air or something...?

thE ReAL.jpg
wooden proto top.jpg
wooden tab height.jpg
like a glove.jpg
metal plate raptor 8.jpg
 

Growmau5

Well-Known Member
If you could get ahold of a spool gun or tig let's just say the whole plate is now a heatsink. Yes the artic 64 plus works fine just make sure you have some airflow through the hood. The cxb3590 run pretty cool @ 1400ma anyways.
right on Stephen! thanks for the advice. I could pull out the TIG and weld it all together for an extra 2200 sq/in of surface area. great idea.
 

robincnn

Well-Known Member
This is a test fixture, so thermocouples will be used in event of failure. But what do u guys think? will the arctic alpine 64 plus handle the heat load enclosed in a hood? should I add some baffling to channel the air or something...?
Thermocouple for measuring case temperatures. I assume you mean thermal fuse/switch/protector. Arctic alpine 64 should work great. You can try running them at 5V.
Not sure if airflow in hood is enough for a semi passive approach with some heatsink USA profiles.
I thought you did not like those lenses. I thought you will got with reflectors in next build.
 

Growmau5

Well-Known Member
Thermocouple for measuring case temperatures. I assume you mean thermal fuse/switch/protector. Arctic alpine 64 should work great. You can try running them at 5V.
Not sure if airflow in hood is enough for a semi passive approach with some heatsink USA profiles.
I thought you did not like those lenses. I thought you will got with reflectors in next build.
you are right, thermal switch or something..
i dont love the lenses, but I don't hate them. I cant think of a way to seal the cobs and make it look clean w/o using lenses. (unless i weld it all together) But this light is not for me, and all of the components are already purchased, lenses incl.
 

robincnn

Well-Known Member
@Growmau5 You already tried the LEDIL reflector F13838_ANGELINA-XW. There is a diffuser cover that can go inside reflector to cover the COB's LES. Checkout F13671_ANGE-RZ-LENS
It will have an additional 5-10% loss but it has the benefit that it covers/protects the LES and also increases the diffused light. It does not give air tight seal like lens. It has a small gap so VOC's can escape off easily.
POS might share his perspective about diffuser here https://www.rollitup.org/t/diy-led-grow.738671/page-49#post-12110122

upload_2015-11-30_23-34-21.png
Better photo here https://www.rollitup.org/t/led-build-2-heatsink-200w.869479/page-3#post-11590622
 

bassman999

Well-Known Member
Excuse me, sir! You're fix ideal holders by capton tape? OMG! I suggest you never do like that if you want your cobs live long.
I was going to do that, but the holders when not bolted down dont hold the cobs against the hs, at least mine didnt.
 

Waiks

Well-Known Member
KAPTON FOREVER!!!!

I check it often. Hasn't come loose one bit. The paste made a nice vacuum seal, and the tape is double enforced. If anything, I'll tape it up some more after this run for reassurance.
 

littlejacob

Well-Known Member
www.rollitup.org/t/the-far-red-thread.867665/

Ran for 5-10 minutes right after main lights off. It emulates sunset and puts the girls to bed faster, increasing the amount of "night time" they receive. Basically helps them to finish a lil earlier. Basically. That thread I linked is wonderful

@tick tack toe
Bonjour
What is the distance between your cob?
And I guess it is 1w sq/ft for 730nm...how many w do you have and
how much did you pay? I guess alibaba 3 $ 50mm cpu cooler would be ok to cool 3w 730nm mono!
Have a great day★
 

Waiks

Well-Known Member
@littlejacob Aloha!
21.6 cm and 48.26cm is the distance between the cobs.

3 x 1.9v @350ma cree xpe so like 2W over the 91cm x 50cm tent
Just a bit over 15cm in between the red LEDS
Seems to cover it nicely, really cool looking!

Total cost was just over $30.00 USD
Solderless chips (3) $3.75
http://www.rapidled.com/solderless-cree-xp-e-far-red-led/
Driver $10.00
http://www.rapidled.com/moonlight-driver-350ma/
Driver wire $1.00
http://www.rapidled.com/driver-jumper/
Plug thing for solderless $0.75
http://www.rapidled.com/solderless-led-plug/

You can probably find a cheaper driver somewhere, but it was easy to order everything all at once, and the driver I did get from them was really novice friendly. I mounted the stars on some extra aluminum U channel I had laying around. No paste, just kapton taped the star straight to the aluminum. The stars don't get warm at all. And it's only going to be on for a few minutes anywho.
The entire build and mount took 7 minutes MAX, thank you solderless!
 

littlejacob

Well-Known Member
Bonjour
Thanks for the response!
It is cheaper than i thought...
And yes better take everything at the same place!
I guess I will need 5w so maybe 6@350mA to cover the 3.5*3.5 so 60/70 $...It will be an upgrade for my 3rd cob grow...2nd I will add more cob and 4th I will try UV! I want to be sure how adding those will change parameters
Have a great day ★
 

Waiks

Well-Known Member
Bonjour
Thanks for the response!
It is cheaper than i thought...
And yes better take everything at the same place!
I guess I will need 5w so maybe 6@350mA to cover the 3.5*3.5 so 60/70 $...It will be an upgrade for my 3rd cob grow...2nd I will add more cob and 4th I will try UV! I want to be sure how adding those will change parameters
Have a great day ★
Smart way to upgrade! I still need to get 730nm into the mixed spectrum cab. Excited to see the results of added 660 and uva in there.

Did you have any changes in between your first and second cob grows? Set up, results, etc.
 

bmgnoot

Well-Known Member
nothing noone hasnt seen 100 times before, but as a novice first timer, wiring up that first series of COB's and plugging it in for the first time... hoping to get blasted with light and not an anticlimactic shroud of darkness...feels good man! now to get some plants under em.. and finish the other 2.
thanks @SupraSPL ...if i had a christmas card list, you'd be on that shit. FO SHO. :joint::hump:
 

Attachments

Last edited:
Top