gotkush?
Well-Known Member
Hey thanks for having the patience to answer my dumb ass questions, but at least i dident ask "how does it work if the lights are so far away?" again.
I'm still in the process of setting up, going really slow because i have to be ninja-like stealth. but, i think i finally have everything i need, now i just have to put it all together. I would love to post my grow step by step, but like i said, i gotta keep it really quiet. so once i get it set up i'll try to get some pics.
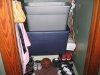
i was thinking because of the space issue with my one 45 gal tote, i would just grow 12/12 from bag seed. but after doing some reading on that, i decided to make more room. so i i'm putting a 30 gallon tote with a adjustable light reflector on top of the 45 tote to allow space for veg time. i'm gonna hope and pray that my passive intake and this old air purifier that i found in the basement works for a good stealthy exhaust. what do you think?
I'm still in the process of setting up, going really slow because i have to be ninja-like stealth. but, i think i finally have everything i need, now i just have to put it all together. I would love to post my grow step by step, but like i said, i gotta keep it really quiet. so once i get it set up i'll try to get some pics.
i was thinking because of the space issue with my one 45 gal tote, i would just grow 12/12 from bag seed. but after doing some reading on that, i decided to make more room. so i i'm putting a 30 gallon tote with a adjustable light reflector on top of the 45 tote to allow space for veg time. i'm gonna hope and pray that my passive intake and this old air purifier that i found in the basement works for a good stealthy exhaust. what do you think?
 I was in your same situation where I had to be super stealth when setting it up (almost got caught before I started lol) but now that it is, taking pictures and watering is pretty easy.
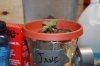
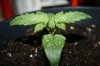
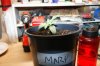
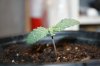
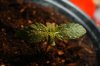
 no idea what kind or anything just that it was there and it prob shouldn't. so i killed it and everything returned to normal. I decided to put some screen over the passive intakes for the grow room to keep the pests out. this is where i believe the bugs got in. ok so picture time...
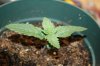

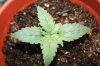
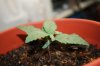
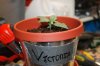
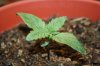
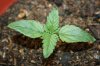

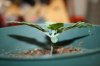
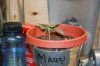

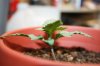


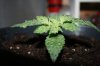
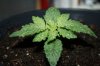
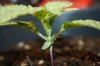
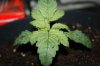
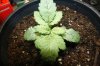


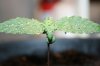
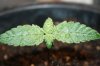
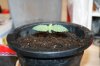
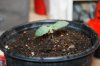
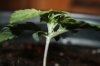
 to Victoria. That's as of this morning and I transplanted yesterday. Luckily its not to bad and only to the first set of leaves so I'll just cut those off later once more growth takes over.
 but I think you'll be fine. Ok I'll do an update in a few days...busy week starting tomorrow. Peace