Simple DIY 2x3 Flood Table W/ Tray Stand For $100 Or Less

AlphaPhase

Well-Known Member
Hey RIU,

I am in the midst of converting my veg room to hydroponics. I wanted to do a simple flood table that can support my mother plants and I am always on a budget. So after I figured out the specs that I would like to do and bought all of the stuff that I would need, I figured I'd share with yall in case someone is also on a budget and would like to do flood tables. Buying premade flood tables are expensive.. Not to mention the price of the flood table stands! A pre built system is easily going to run you upwards of $300+.

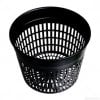
So here is what you will need. Everything can be bought at home depot except for the pump, net pots and hydroton. I already have an extra pump and hydroton, but I will include a full list of the things you will need below.

Home Depot:

Hydro Store Or Online:
  • Fill And Drain Bulk Head Kit $10
  • 5" Net Pots $.50 cents each
  • 250gph Water Pump $20

And that is all you will need.

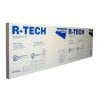
The insulation board is what you will use as the top of the flood table. Just cut on round holes to fit the net pots in any pattern you'd like. It's easy to cut and work with.

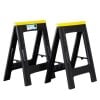
The saw horses will be used for the flood table support. A flood table stand will cost you upwards of $200. Building one out of pvc can be a pain and if you use 1/2" it will be flimsy. The saw horses can hold 1000lbs each so you will not have to worry about anything collapsing.

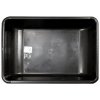
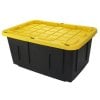
The cement tub is 2x3' and 7" tall. It is perfect for a flood table.

The tote is for the water reservoir and is perfect size to use with this cement tub.

The pump and bulkhead kit is what will flood the table (if you were unsure).

The only thing you have to do is cut the holes for the net pots in the insulation board, cut 2 holes in the cement tub for the bulkheads. Set it on top of the saw horses ( I will be laying two boards across the saw horses for more support.) And voila, a 2x3 flood table for under $100.

If you have any questions feel free to ask, I'm not going to go into detail about what size the holes need to be drilled to because some bulkheads are different sizes, I think you all can handle that part and figure it out :)

Hope this helps anyone thinking about doing ebb n flow.


Attachments

greywind

Well-Known Member
Is the cement tub hanging on the sawhorses by just the lip?

I am also converting my grow to flood and drain systems using these same tubs. I have a small and large tub going. I really like the idea of using the sawhorses to hoist the tubs up, but I think I would definitely use support boards underneath the tubs. I'm currently using two boards across Home Depot buckets, but I want/need more height over my res.

How many plants do you plan on growing in that large tub?

Thanks for the idea and happy growing!
 

AlphaPhase

Well-Known Member
You're welcome man! Home depot has a variety of saw horses, some more sturdy than others, I just went with the cheap ones because I have another pair of them that I use and they are pretty sturdy for being cheap plastic. The wooden or steel ones would be a lot better but they are 2x the cost.
The tub lip is hanging on the lip of the saw horse. It actually fits snug and very sturdy as is, though my first idea was to use a piece of plywood across the top to support it. I put my body weight on it, well most of it, and it didn't bow or move at all, I was surprised. I'll do a test run with out plants in it to make sure everything holds up properly and doesn't fall and cause a mess lol. It holds 20 gallons I think, so I will only be filling it 15 gallons or so, which is what? About 75 lbs of water give or take. I plan on using it for mother plants, I'm thinking 12-16 4" net pots. I may not fill it with that many plants but I'd like to have some options if I come across a plant I'd like to keep. I'll be making the top today out of the insulation board. I just have to go pick up some more net pots and the fill/ drain kit. I'll keep ya posted and show the final product and let you know if any support would be needed. I think it will be fine without the supports but if it gets bumped into it might be a disaster. I have some wood precut just in case. .
 

propertyoftheUS

Well-Known Member
Man the more posts I read, the more people I see using those cement tubs!! I have 3 of the 30"x20"x7" tubs side by side by side in my closet with two of the totes you have shown for reservoirs. My closet is exactly 30" wide so 3 of the smaller totes fit better than two of the bigger ones. I have all three tubs fill lines connected with 1/2" PVC to a 1200 gph pump and the drain lines connected with 3/4" PVC split between the two tubs. I have the tubs connected to one another about 3" from the bottom with 1" PVC. The insulation board is a great idea for lids, I was gonna try stretching panda film but didn't think it'd be sturdy enough<< and it probably wouldn't have been. Thanks for the great idea!! I'll try to get some pics as soon as I get the insulation board.
 

hbbum

Well-Known Member
I use the same cement mixing tub. For a table I am using a small table I built out of a scrap piece of plywood (3/4" thick) and a space 4x4 I had laying around for the legs. I just drilled a 6" hole for the fill and drain holes and I put 3/4" holes in all 4 corners so I can mount a screen made out of PVC.

This is the table with the screen, but before I modified with the 6" hole for the drain tubes.


The screen can be moved up and down by sliding them in the holes. You will want to paint or at least seal the table top. But its super stable and you can adjust the height of the table based on how you cut your 4x4 legs. You can also give the table a slight slope if you want to help the table drain, or I just put a small strip of 3/4" plywood at the end to give it a slope.


Before I put the table in:
 

AlphaPhase

Well-Known Member
The insulation board is awesome for a bunch of different things, here's my first diy flood table from many years ago, it was sturdy as hell, but I wish I knew about the tubs sooner lol. This is only the 2nd cement tub table I've made, last time I used pvc to make a tray table but it was expensive for the 3 way elbow connectors and kinda flimsy. That's an awesome idea with adding the holes for the pvc legs and screen! Some good ideas Rollin around today 8-)
 

Attachments

propertyoftheUS

Well-Known Member
Okay y'all I have an idea based on riddleme's make it rain method but need help with the logistics. So far some of the best ideas I've seen on this forum in a while have came from this thread. Anyway, how could one make a flood and drain system just flood ph'd water for the first half of the day and then flood nutes the second half? I've tossed around a couple different ideas in my head but haven't been able to come up with a simple system not requiring actuators for valves or 4+ pumps 2 of which are for draining. Any ideas would be much appreciated. And sorry not trying to thread jack
 
Last edited:

hbbum

Well-Known Member
Not sure why you would need to do this. For soil they get fed every time, even though you may only feed every 2 or 3 waterings, it's in the soil.
 

propertyoftheUS

Well-Known Member
Eplosi e growth is why. Read riddleme's "make it rain" method and see the results for yourself. I still haven't thought of an easy way to do it, probably isn't one lol.
 

AlphaPhase

Well-Known Member
hey propertyoftheus, i'm not sure what the technique is, i tried searching RIU for "make it rain" but can't find it, can you link me to the page please? I'll give it a read and see if I can come up with anything.
 

AlphaPhase

Well-Known Member
Finished up the table. Here's the finished product. I went with 8 pots since it'll only be used for mother plants instead of 16, wanted to give the plants enough space so they're roots don't tangle. I cut a flap in the tote for easy access to see water level and pop in a 2 litter bottle of ice if need be. Couldn't be happier with the way it turned out, very solid. The only hard part was I didn't have the exact size hole saw to drill the holes for the fittings so I picked one that was a tiny bit smaller and then sanded it with my dremel to the correct size. The fittings are TIGHT, they actually thread into the holes so I probably will never have a leak. So there you have it, a nice, cool looking, durable, slick bad ass reflective flood table for under a $100 bucks!
 

Attachments

waterdawg

Well-Known Member
Great job alpha, I am always trying new setups and the one thing I added to my tray was a overflow tube an inch from the top. That saved me from a couple of disasters, I just used a small thru-hull fitting and 1/2 tube to res. Again great job, keep us posted!
 

propertyoftheUS

Well-Known Member
Hey alpha, how often/long do you flood? I plan on flooding 15 mins each hr up until week 3 flower and then increase to two 15 min intervals per hr during lights on and 15 mins once per hr during lights out
 

AlphaPhase

Well-Known Member
At the moment my plants in flower in the ebb n flow bucket system are being flooded for 15min 4x lights on (every 3 hour) and once during lights out. I would start with flooding every 2 hours if they are small and once they get a bigger root system you can flood less. What i do is start with 2 hrs, if the plants don't start to droop I go to 2.5 hours, if still no drooping I go to 3 hours and so on. Once you see any signs of drooping while lengthening the flood intervals, you want to subtract 30 min and set the timer for 30 minutes earlier. So if theystart ddrooping at 2.5 hour floods, set the flood time to every 2 hrs. Hope this helps, plants like a good wet to dry ratio to grow best. I haven't checked the make it rain thread yet but I will sometime today.
 

AlphaPhase

Well-Known Member
Oh and the major factor of flood times is how much medium your using. I changed my ebb n flow buckets to use 5" net pots so there is very little hydroton. So they can be flooded more. Last grow I used 2 gallon net pots and I could only flood every 6 hours or so. The more medium the less you'll flood and the less medium the more you'll flood.
 

AlphaPhase

Well-Known Member
Great job alpha, I am always trying new setups and the one thing I added to my tray was a overflow tube an inch from the top. That saved me from a couple of disasters, I just used a small thru-hull fitting and 1/2 tube to res. Again great job, keep us posted!
Thanks waterdawg! I do have an over flow, it might be hard to see in the pic, I got adjustable 1" overflow which will be nice so I can lower the flood level as the plants roots get bigger. I haven't put any plants in it yet, but I have some seedlings and a couple clones I'll be putting in there once the roots come through the root plug and net pot. Can't wait to get it going, it feels so good not having to mess with soil for a while, soil pots just take up way too much space for my room and I suck at growing in soil so when I see my unhealthy soil plants it's depressing lol
 
Top