THIS IS THE LAST TIME I will post how to wire this light. Use your eyes/hands/feet/vagina/penis whatever to look through this thread because a few of us have posted countless times how to wire this up.
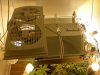
Ok on the econolight, when you remove the glass and shield (2 screws hold it on) you will see the socket. The round metal piece that the glass screws into also has 2 screws, removed those and the whole piece, socket included, should come off of the main metal housing. Have I lost you?
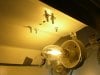
You should see two wires, white and black, from the main housing to the socket. I cut those in half, bought a 12ft extension cord (2 prong) and extended the white and black wires. I found this to be the easiest way to make this remote, I don't have to take anything else apart. Make sure to use electrical tape and wire caps. Next buy a 3 prong extension cord, strip the female end. You should have a white, black, and green wire.
The econolight has a white/ black/ and copper wire. Match colors up, and connect the green and copper wire (Ground) together as well. Tape and cap it up and walla you should have liftoff. Feel free to make your own reflector how you see fit.