So here is the final installment many of you have been waiting for. My next step it to put everything together into one convenient post. So have fun!
Aeroponic/NFT Assembly Instructions vers 1.1
By Stinkbud
Step 1 – Cutting the ¾” PVC Pipe for the Frame
1) 4 - 41” lengths (label plant support)
2) 4 - 20” lengths (label “H”

3) 6 - 4 1/8” lengths (label fence post holder)
4) 3 - 14 3/4” lengths (label 1- “H” and 2 -“end”

5) 4 - 18” lengths (label plant support leg)
6) 4 - 12” lengths (label plant support leg)
7) 4 - 2” lengths (label end)
8- 2 - 12 1/2“ (label front)
9) 2 - 13 1/2” (label back)
Step 2 – Preassemble Your Frame
1) Start with the ends. Use 4 - Tees and 3 – 4 1/8” lengths to make the fence post holder.
2) Add the legs and bottom Tees. Don’t forget the front and back label!
3) Add the 2” pieces to the bottom of the Tees
4) Add the Elbows to the 2” pieces. Make sure the elbows are facing toward each other.
5) Connect the Elbows with the 14 ¾” pieces. The ends should be complete now.
6) Now make the bottom “H” using 2 - Tees, 4 – 20” pieces and 1 – 14 ¾” piece.
7) Connect the two ends together using the “H”.
8- Create your plant supports using the 4 – 41” lengths and 4 – Elbows.
9) Add the 12” and 18” plant support legs and place the plant supports into the frame.
10) If everything fits then take the unit apart and glue all the pieces together. Be careful, the glue
dries fast!
Step 3 – Assemble the Fence Posts
1) Measure and mark the 2" net pot holes (according to the plans).
2) Clean up the holes with the Exacto knife.
3) Put a large bead of Silicone inside 2 of the end caps and place them on the back end of the fence
posts.
4) Run a bead of Silicone around the edges of the end cap and let the posts dry
5) Cut the bottom ¼” off of the 2 end caps. Use a small drill drum sander to sand an opening for the
sprayer pipe assembly. A Dremel tool works well too.
6) Place the fence posts on the frame and use large cable ties to hold it in place.
Step 6 – Cutting the Sprayer Assembly Pipe
1) 2 - 3” lengths
2) 2 - 2” lengths
3) 2 - 47” lengths
4) 1 - 11 1/2” length
Step 7 – Assembling the Sprayer Unit
1) Drill ten 11/64” holes in the 47” length pipes according to the plans
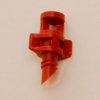
2) Use pliers to insert the EZ-Cloner sprayers into the holes
3) Attach end caps and elbows to the sprayer pipes
4) Put the 2” pipes into the elbows
5) Combine the two sprayers together with a Tee
6) Add another 2” piece to the Tee and a downward facing Tee to that
7) Attach the last 2” piece to the Tee.
8- Attach the ball valve and garden hose adapter to the last piece
9) Try it out in the fence posts and if everything looks good, glue it all together.
Step 8 – The Container Lid
1) Put the container and lid under the fence post and draw a drain hole under the fence posts.
2) Cut out the holes with a utility knife and clean up the edge with the small drum sander.
3) Drill a 2” hole for the pump pipe.
4) Cut a large access hole with the utility knife. Leave one edge attached to make a flap that can be
closed.
Step 9 – Final Assembly
1) Place the pump into the container and run the 11 ½” pipe through the lid.
2) Put the sprayer assembly into the fence posts.
3) Put the container under the frame and attach the pump pipe to the sprayer assembly.
4) Apply a few small drops of silicon the drain end caps and place them on the fence posts. Don’t
use much silicon because you want to be able to remove the caps when needed.
5) Fill the containers and place empty net pots with collars into the fence posts.
6) Check for leaks. If everything is OK then you are done! Congratulations!!!
Step 10 – Mixing the Nutrient Formula
Botanicare Nutrients:
1) 126ml Cal-Mag Plus
2) 150ml Sweet
3) 180ml Liquid Karma
4) 540ml Pure Bend Pro Bloom
Mix all the nutrients together in a gallon jug and top off with water. Shake well!
Step 11 – Setup and Conclusion
1) Add 15 Gal. of water. (approx.) to the reservoir
2) Add nutrient mix until the meter reaches 2000 PPM
3) Adjust the PH to 5.8
4) Fill the flower unit with your favorite strains from the veg unit.
5) Set your cycle timer to one minute on and five minutes off.
6) Enjoy your new Aeroponic system!!! You should see some amazing buds in no time!
7) Don’t forget to pass the love on…


