One of the first things you're going to need is a cloner. This is a cleaner design than my original H-layout design. The drain valve is optional but if you've ever tried to carry 15 gallons of water you know it can get exciting real quick!
The parts list is on the plans. All the photos and plans needed are attached.
Step 1 Cutting the ½ PVC Pipe
1) 2 21 ½ lengths
2) 2 - 4 lengths
3) 3 - 9 lengths
4) 1 - 3 length
5) 2 - 4 lengths
6) 3 3/4 lengths
Step 2 Preassemble Your Sprayer Frame
1) Start with at the pump and connect a 3 piece to the ½ pump adapter.
2) Add the 4-way cross to the 3 piece.
3) Add the 4 pieces to each side of the cross.
4) Add elbows to each 4 piece.
5) Attach a 3/4 piece to the top of the cross.
6) Add the Quick Disconnect to the top of the 4-way cross and insert a 9 piece into that.
7) Add the long 22 pieces to each elbow.

Attach another set of elbows to the long PVC pieces. Make sure these are facing down.
9) Add the end 6 ½ legs to each elbow and attach elbows to the end of these pieces.
10) Now add the final 9 piece between the elbows.
11) Add an elbow, ¾ piece, valve, ¾ piece in that order.
12) Add the last elbow with threads on one side. Screw the garden hose adapter into the threads
Step 3 Drill the Sprayer Holes
1) Measure and put a mark 2 from the end of the 22 piece.
2) Mark off every 4 ½.
3) Use an 11/64 drill bit to drill the holes
Step 4 The Cloner Lid
1) Measure out 35 holes in the center of each raised square.
2) Use the 2 hole saw to cut the holes.
3) Use a sharp knife to clean up the holes.
4) Paint the lid with two coats of gray primer. Finish with two coats of white plastic paint.
Step 5 Final Assembly
1) Place the pump and sprayer unit into the container and check to make sure everything fits well.
2) Take apart the sprayer unit and reassemble the unit using PVC glue.
3) Start at the pump and build out from there. Be careful because the glue dries fast! Do only one part at a time until the unit is completely assembled.
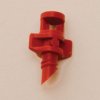
4) Screw in the sprayers. You may need to use a pair of pliers to get them in.
5)
Run a bead of rope caulk around the edge of the base unit to seal against water leaks. One package can be split into two sections to cover the whole base.
6) Run the cord through the lid and neoprene collar. Dont put the lid on yet.
Step 6 Setup and Conclusion
1) Add enough water to cover the pump but dont fill it over half way. We dont want the roots to hang in the water.
2) Add 150ml of Clonex solution to the water (optional) and adjust the PH to 5.8
3) Set your cycle timer to one minute on and four minutes off.
4) Put the lid on the container.
5) Fill the cloner with your favorite strains. Dont spray the cuttings.
6) Enjoy your new cloner!!!! You should see roots within a week.


