covertgrow
Well-Known Member
ok so it may not exactly be free but i had all this stuff gathering dust, so this actually didnt cost me a penny!!
1st off let me emphasize on the word MICRO lol this is small, i have no idea about the temp inside when light on,
i think it would be good for young plants/ clones etc,
dont flame me if you think its rubbish......improve on my mistakes!
i added a timer for a relatively simple seperated grow area to attempt to force my possible male plant to flower so i can tell the sex for sure.
FIRST YOU NEED:
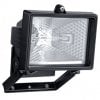
1X HALOGEN SECURITY LIGHT (we dont use the halogen bulb)

1X SMALL CFL, (the best i had that would fit is a measly 14watts warm white but i had a small security light)

1X MAINS LEAD WITH PLUG
1X LARGE PLANT POT (mine is 10 inch square by 12 inch high)

TOOLS USED:
STANLEY/CRAFT KNIFE

INSULATION/ELECTRICAL TAPE

GAFFA/DUCT TAPE

OPTIONAL:
SOLDERING IRON

MYLAR/WHITE PAINT


WHAT TO DO:
STEP 1.
take your security light and discard the bulb, unscrew it somehow and get the wires, connect them to your cfl
heres where the soldering iron comes in usefull, in my security light i barely had room for the cfl let alone the fitting,
so.... i soldered the wires straight on to the bulb and taped it all up really well with the insulation tape
then put your cfl in the reflector and replace the glass cover, (i suppose you could leave the glass cover off as cfl's dont produce 2 much heat)
OR FOLLOW THIS >>>GUIDE<<<
STEP 2.
take your large plant pot and turn it upside down,
get your stanley knife and cut a whole large in the bottom that is large enough to fit the glass of the security light into without the light falling through,
STEP 3.
using the gaffa tape attach your security light glass down on to the bottom of the pot so that the light shines straight through and out the top ( i had no gaffa tape so i tied my light on temporarily)
STEP 4.
FINISHED!!!
THATS IT!!!!
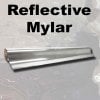
i lined mine with reflective material that goes behind radiators lol as it was all i had around at the time,
you could use mylar or matt white paint or,,, nothing, up to you, best to have something though.


you then put this over the top of your plant and pot!!!

my plant is inside an old planter with a few weights stacked under the pot to raise it to within 3 inches of the bulb,


with its pot all the way inside the planter with no weights underneath it gives me 16 inches between light and plant

as it is black plastic it is good for the dark period too!
it has vents in the bottom which is now the top dont know how warm it gets yet,

THANKS FOR LOOKING!!!
REMEMBER WHEN USING SHARP TOOLS ALWAYS GET A RESPONSIBLE ADULT TO HELP!
covertgrow.
1st off let me emphasize on the word MICRO lol this is small, i have no idea about the temp inside when light on,
i think it would be good for young plants/ clones etc,
dont flame me if you think its rubbish......improve on my mistakes!
i added a timer for a relatively simple seperated grow area to attempt to force my possible male plant to flower so i can tell the sex for sure.
FIRST YOU NEED:
1X HALOGEN SECURITY LIGHT (we dont use the halogen bulb)

1X SMALL CFL, (the best i had that would fit is a measly 14watts warm white but i had a small security light)

1X MAINS LEAD WITH PLUG
1X LARGE PLANT POT (mine is 10 inch square by 12 inch high)

TOOLS USED:
STANLEY/CRAFT KNIFE

INSULATION/ELECTRICAL TAPE

GAFFA/DUCT TAPE

OPTIONAL:
SOLDERING IRON

MYLAR/WHITE PAINT


WHAT TO DO:
STEP 1.
take your security light and discard the bulb, unscrew it somehow and get the wires, connect them to your cfl
heres where the soldering iron comes in usefull, in my security light i barely had room for the cfl let alone the fitting,
so.... i soldered the wires straight on to the bulb and taped it all up really well with the insulation tape
then put your cfl in the reflector and replace the glass cover, (i suppose you could leave the glass cover off as cfl's dont produce 2 much heat)
OR FOLLOW THIS >>>GUIDE<<<
STEP 2.
take your large plant pot and turn it upside down,
get your stanley knife and cut a whole large in the bottom that is large enough to fit the glass of the security light into without the light falling through,
STEP 3.
using the gaffa tape attach your security light glass down on to the bottom of the pot so that the light shines straight through and out the top ( i had no gaffa tape so i tied my light on temporarily)
STEP 4.
FINISHED!!!

THATS IT!!!!
i lined mine with reflective material that goes behind radiators lol as it was all i had around at the time,
you could use mylar or matt white paint or,,, nothing, up to you, best to have something though.


you then put this over the top of your plant and pot!!!

my plant is inside an old planter with a few weights stacked under the pot to raise it to within 3 inches of the bulb,


with its pot all the way inside the planter with no weights underneath it gives me 16 inches between light and plant

as it is black plastic it is good for the dark period too!
it has vents in the bottom which is now the top dont know how warm it gets yet,

THANKS FOR LOOKING!!!
REMEMBER WHEN USING SHARP TOOLS ALWAYS GET A RESPONSIBLE ADULT TO HELP!
covertgrow.


