Need to buy a bulb help me!
- Thread starter DunLarkin
- Start date
CALIGROWN
Well-Known Member
htg supply.......High Tech Garden Supply or ebay
bubblegumdude
Active Member
global industrial suppy
northern tool company halide hps reflectors for shops same thing
dirt ass cheap
northern tool company halide hps reflectors for shops same thing
dirt ass cheap
Skoosh
Active Member
http://www.discount-hydro.com/
http://www.htgsupply.com/products.asp?categoryID=3&subcategoryID=96
Im personally lookin into gettin a couple of these ->
http://www.e-conolight.com/Product/EProductDetail.asp?ProductFamilyID=7&FGNumber=E-MT6H151G
Its a 150w hps BALLAST INCLUDED for the price of a CFL 4 pack. 20$
http://www.htgsupply.com/products.asp?categoryID=3&subcategoryID=96
Im personally lookin into gettin a couple of these ->
http://www.e-conolight.com/Product/EProductDetail.asp?ProductFamilyID=7&FGNumber=E-MT6H151G
Its a 150w hps BALLAST INCLUDED for the price of a CFL 4 pack. 20$
el seca leche
Well-Known Member
I received the $25 ones today!Im personally lookin into gettin a couple of these ->
http://www.e-conolight.com/Product/EProductDetail.asp?ProductFamilyID=7&FGNumber=E-MT6H151G
Its a 150w hps BALLAST INCLUDED for the price of a CFL 4 pack. 20$
and they are really easy to install, paid $65 with shipping for 2
Skoosh
Active Member
shit really? that nice..i was lookin for someone to actually buy a couple lol. anyway i bet they do well, for 10000 lumens a pop.I received the $25 ones today!
and they are really easy to install, paid $65 with shipping for 2
Skoosh
Active Member
The one that i gave a link to ( is 20$ and therefore the one ill be discussing ) But yeahone is $37, are you remoting the socket????? is it easy?
its pretty damn easy dude..That other guy could tell you better than i though.
el seca leche
Well-Known Member
make it 1500lumens a pop, together making 30000 lumens........btw those $20 ones say this "Consult Factory to Purchase"
el seca leche
Well-Known Member
to tell you the truth i dont even know how to remote the socket but some of the other guys I know on here have posted up details on how to remote it.....one is $37, are you remoting the socket????? is it easy?
but its very very easy
give me a sec and ill post up a pic of the light how it comes, cool???
Skoosh
Active Member
Nice on finding those extra 5000 lumens lol.make it 1500lumens a pop, together making 30000 lumens........btw those $20 ones say this "Consult Factory to Purchase"
But i guess you should just contact them
before ordering.
el seca leche
Well-Known Member
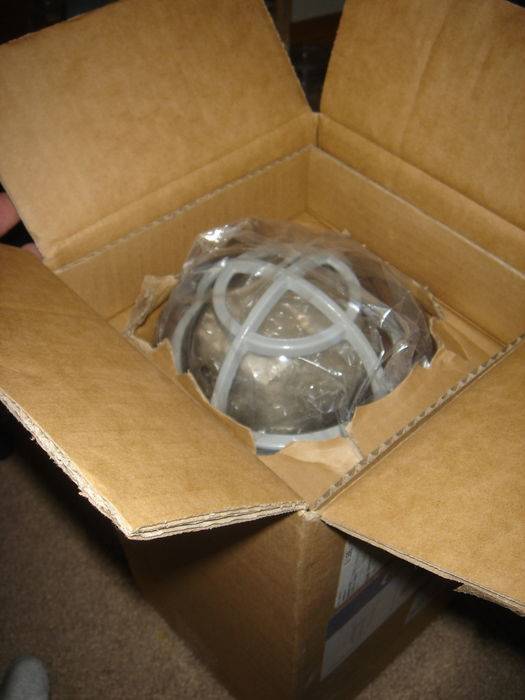
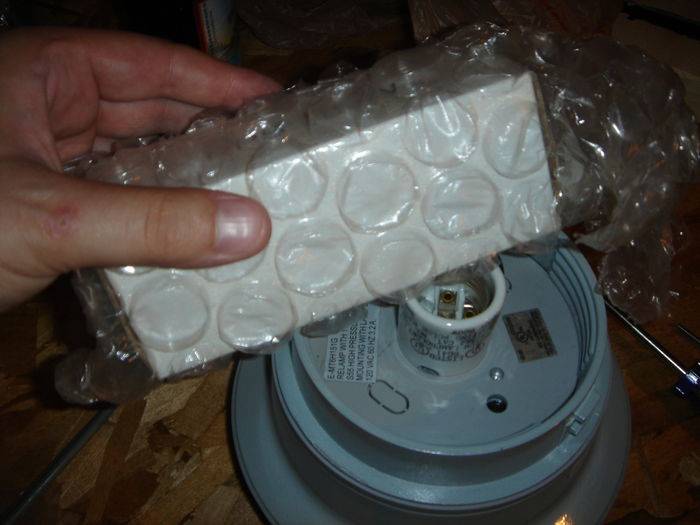
So, the first step is getting your lamp. You can order it from the company using their online order form. I ordered an extra lamp with it. Here is what I got in the mail:


While that is on it's way, you should need some supplies. Before you go out and get some used supplies from some junk bin at a hardware place or out of a dumpster: consider where these electrics may be and/or what they may be near. Now consider the god-awful molded, rotted, worn down meth house this little electrical screw may have come from. Just think about that when you are getting supplies. They aren't very expensive and you'll have to clean the other stuff anyway. So, here's what you'll need:
-the previously discussed wire - I recommended 8ft. because that is plenty for my needs. In this guide, we will be cutting the wire in different lengths: 1 being the plug to the ballast, the other being the ballast where the lamp/socket needs to be. Ensure you get a long enough replacement cable, or additional cable, to suit your needs.
-a 4 inch electrical box
-some wire cutters and wire strippers (or a combo of the them)
-wire screws (variety pack with different sizes is good)
There are other alternatives to the above, but you get the idea.
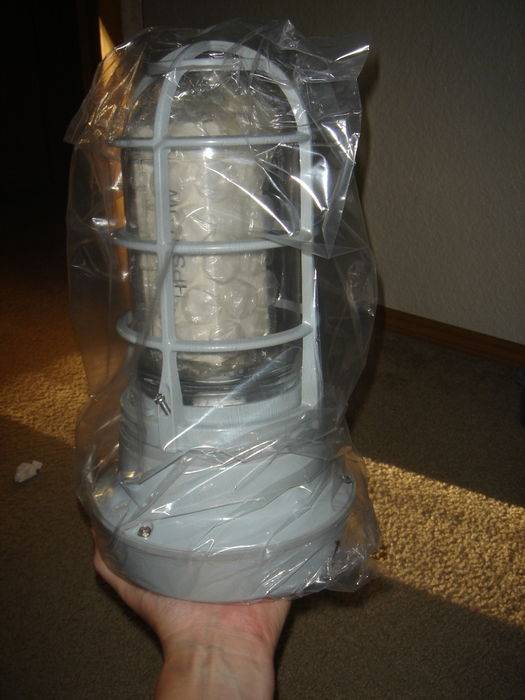
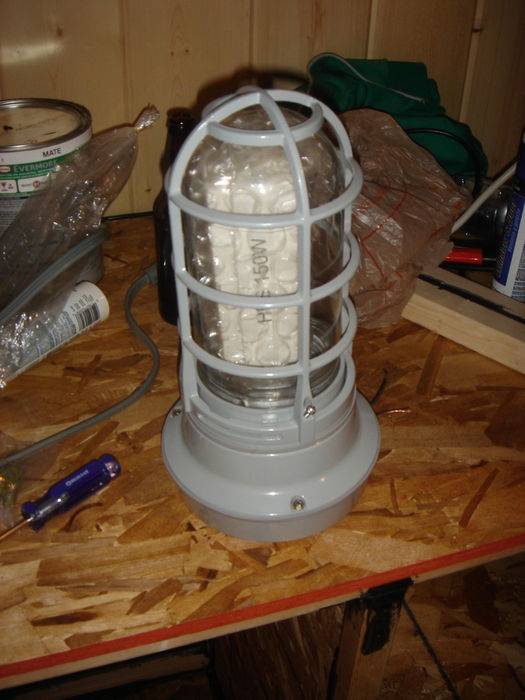
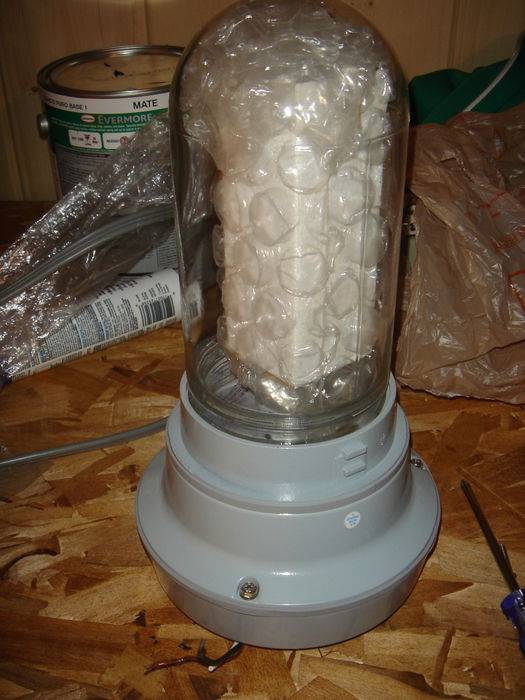
Once a week or so has passed, you'll have your supplies and a lamp. Now that you have your light, you can become a little bit happier:

With your excitement complete, it's time to get your light out of the package and get it ready to disassemble:

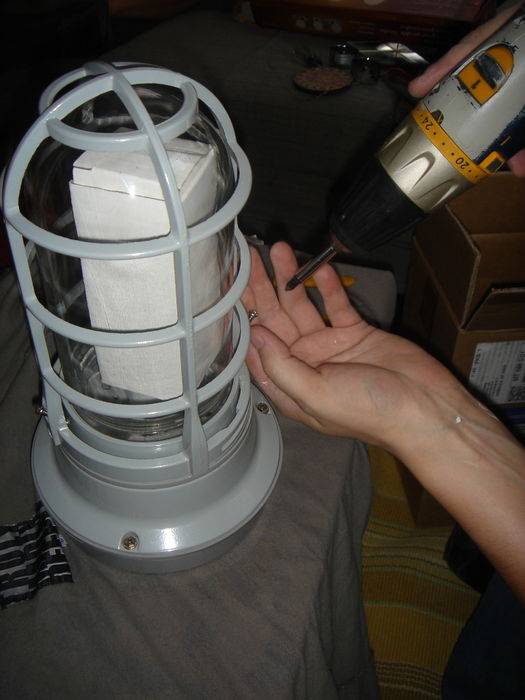
The first thing you'll notice about the light is that it is much heavier and bulkier than anticipated. Trust me. The first two things to remove are the screws on the outside that hold the cage and "light jar" for lack of a better word:


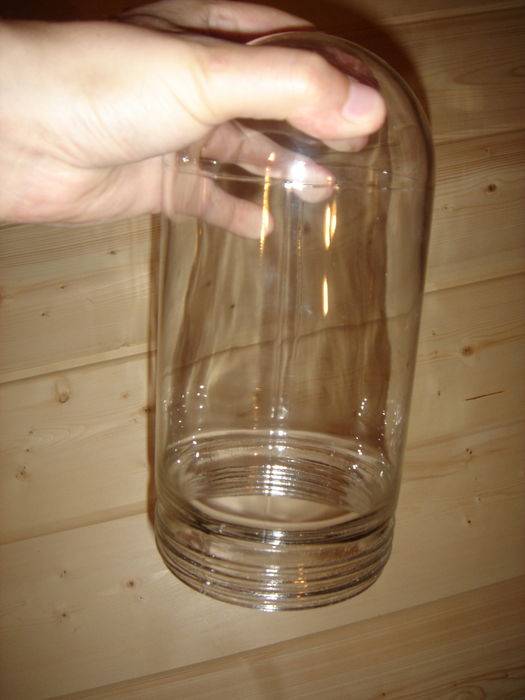
Screws removed, you can twist the cage and pull it off. The light jar will twist out, like a jar, and then you can get your lamp from inside. Set your lamp aside:


Try not to get too many fingerprints on the lamp. If you do, most suggest you wipe them off with a cloth:

There are some weird hidden screws that you have to get to now. They are hidden underneath the large flat rubber guard in the ballast housing. Simply pry the rubber casing up and cut it off. You don't need it. Then you can access the screws underneath:


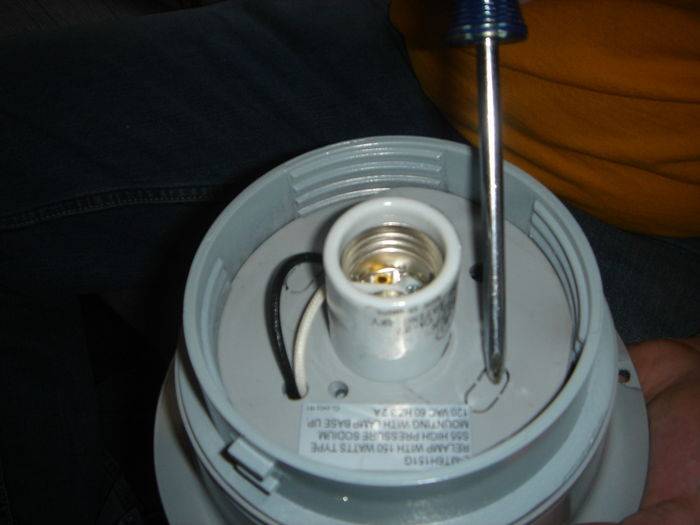
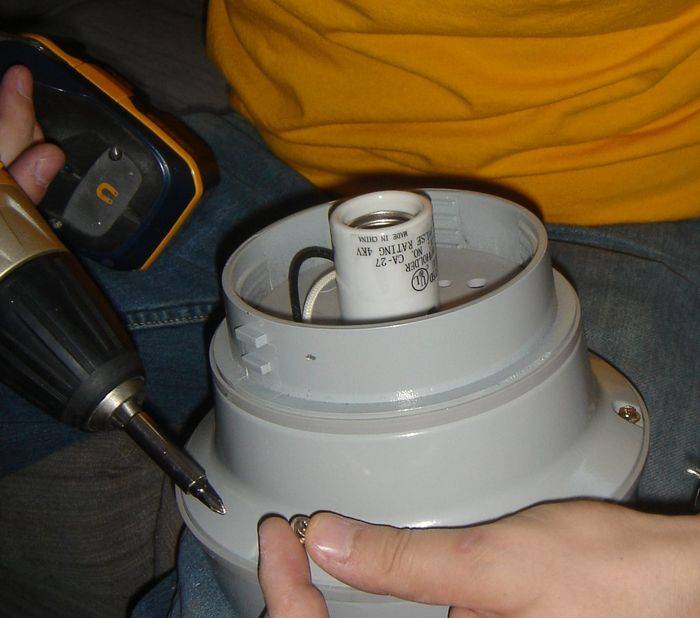
Once you have removed those screws, you will want to remove the screws that are in the very base of the light socket. They are two small silver screws. Be careful when you are removing these and use a small enough screwdriver to fit in there. You don't want to jam something in there and break the socket. I took the bit out of the screwdriver and used it:

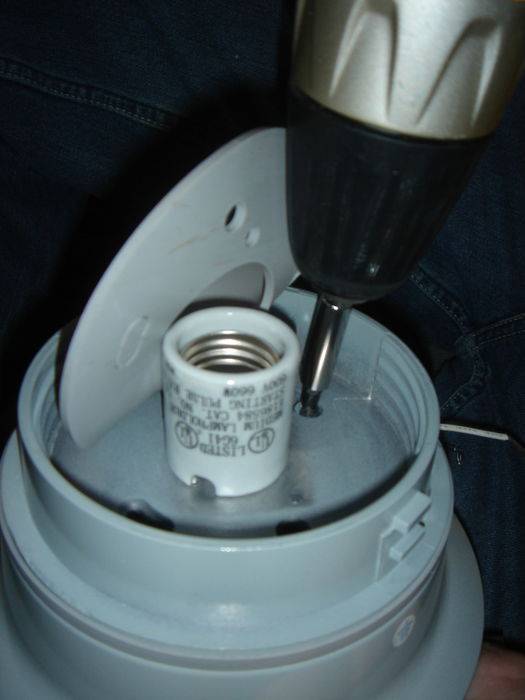
Now you can move to the 3 screws surrounding the ballast housing:

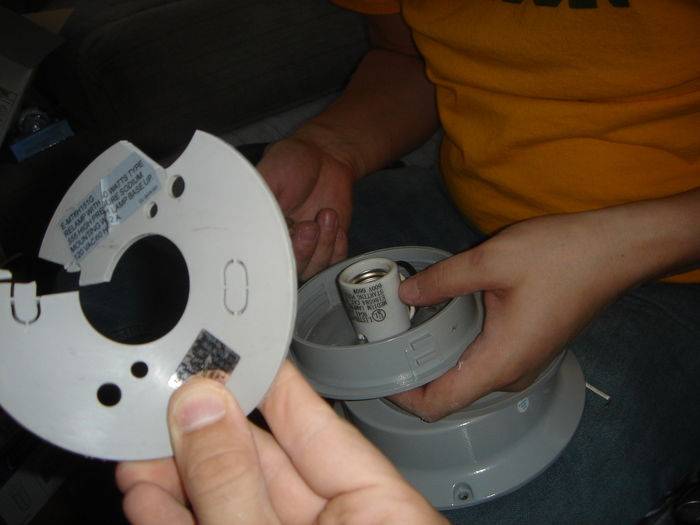
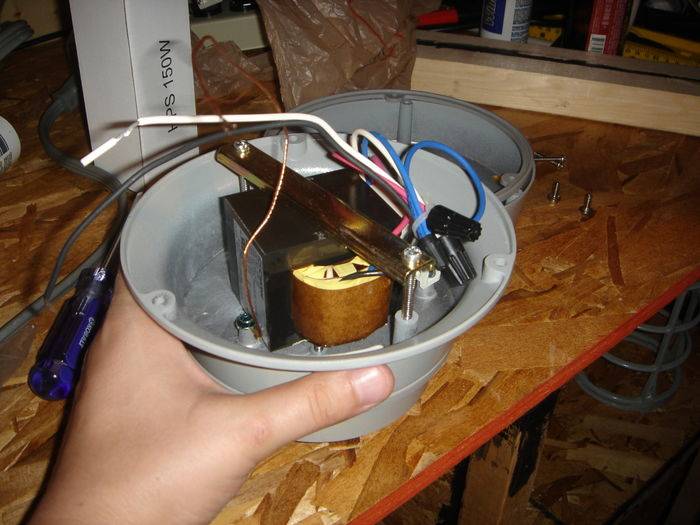
The light will open, and you will see the 4 parts that are the inside of the light.

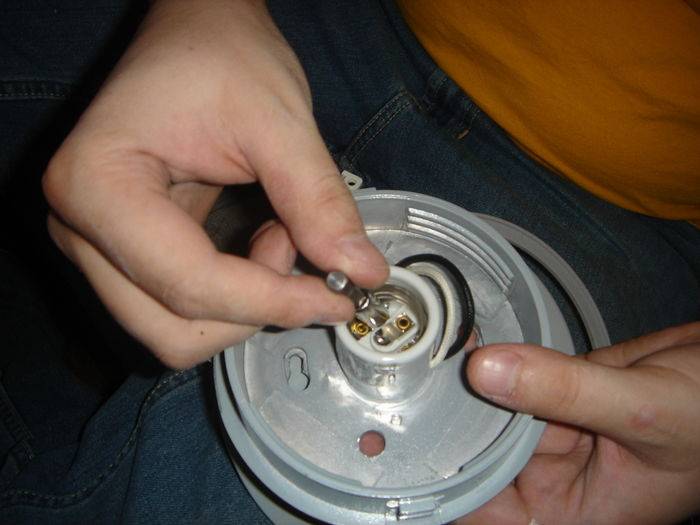
There is a brass colored bar that is holding the ballast in the casing. Leave that in there for now. You can inspect the parts now in all of their glory. Before you disassemble, take a good look at how the unit is wired. Especially if you are unfamiliar with wiring. While a guide can be helpful, but it is good to take a look for yourself. Take notes if you want. Now you can take off the big brass bar. Unscrew all the wire caps. If you took the screws out of the socket before, it will come off now. Now you have your ballast, your ignitor, and your socket. You should give yourself a pat on the back 'cause your halfway through.

While that is on it's way, you should need some supplies. Before you go out and get some used supplies from some junk bin at a hardware place or out of a dumpster: consider where these electrics may be and/or what they may be near. Now consider the god-awful molded, rotted, worn down meth house this little electrical screw may have come from. Just think about that when you are getting supplies. They aren't very expensive and you'll have to clean the other stuff anyway. So, here's what you'll need:
-the previously discussed wire - I recommended 8ft. because that is plenty for my needs. In this guide, we will be cutting the wire in different lengths: 1 being the plug to the ballast, the other being the ballast where the lamp/socket needs to be. Ensure you get a long enough replacement cable, or additional cable, to suit your needs.
-a 4 inch electrical box
-some wire cutters and wire strippers (or a combo of the them)
-wire screws (variety pack with different sizes is good)
There are other alternatives to the above, but you get the idea.
Once a week or so has passed, you'll have your supplies and a lamp. Now that you have your light, you can become a little bit happier:
With your excitement complete, it's time to get your light out of the package and get it ready to disassemble:
The first thing you'll notice about the light is that it is much heavier and bulkier than anticipated. Trust me. The first two things to remove are the screws on the outside that hold the cage and "light jar" for lack of a better word:
Screws removed, you can twist the cage and pull it off. The light jar will twist out, like a jar, and then you can get your lamp from inside. Set your lamp aside:

Try not to get too many fingerprints on the lamp. If you do, most suggest you wipe them off with a cloth:
There are some weird hidden screws that you have to get to now. They are hidden underneath the large flat rubber guard in the ballast housing. Simply pry the rubber casing up and cut it off. You don't need it. Then you can access the screws underneath:
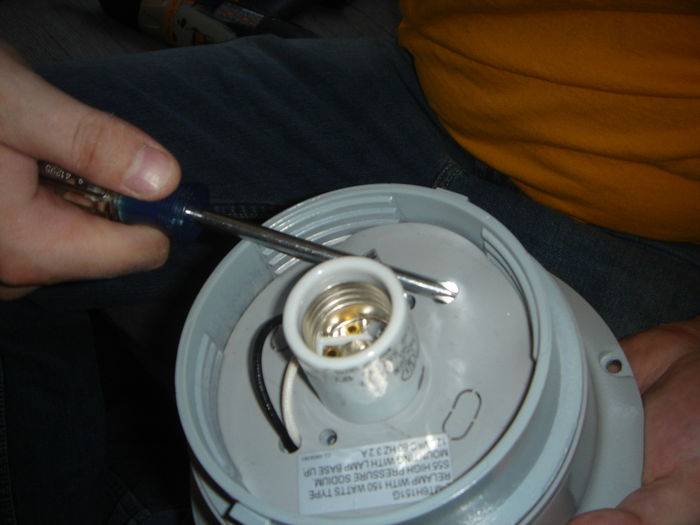
Once you have removed those screws, you will want to remove the screws that are in the very base of the light socket. They are two small silver screws. Be careful when you are removing these and use a small enough screwdriver to fit in there. You don't want to jam something in there and break the socket. I took the bit out of the screwdriver and used it:
Now you can move to the 3 screws surrounding the ballast housing:
The light will open, and you will see the 4 parts that are the inside of the light.
There is a brass colored bar that is holding the ballast in the casing. Leave that in there for now. You can inspect the parts now in all of their glory. Before you disassemble, take a good look at how the unit is wired. Especially if you are unfamiliar with wiring. While a guide can be helpful, but it is good to take a look for yourself. Take notes if you want. Now you can take off the big brass bar. Unscrew all the wire caps. If you took the screws out of the socket before, it will come off now. Now you have your ballast, your ignitor, and your socket. You should give yourself a pat on the back 'cause your halfway through.
el seca leche
Well-Known Member
We've got all of our pieces sitting in front of us.

We've got the ballast (deceptively heavy):

We've got the ignitor:

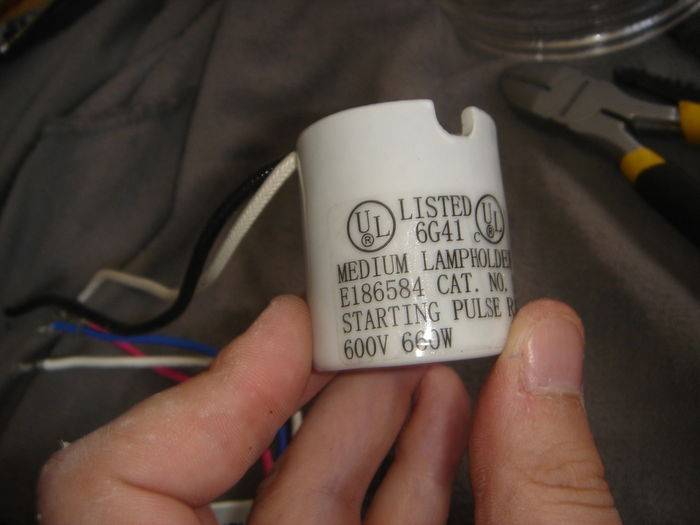
And we've got the socket:

You've also got your plug cord and your extension cord.
A note before we start to put the wires together: take your time with the next few steps. Ensuring that your wires are securely twisted together and that the wire screws are on securely is very important.
I recommended 8 ft. before as you can use the plug to attach to the ballast and use the remaining cord to extend the length from the ballast to the socket.
First, you will want to measure how much distance you will need from your plug, to where your ballast will rest it's electrical box. If you are good at stripping wires then you know how much more space to give yourself. If you aren't, give yourself plenty of extra cable: you may accidentally cut into the cables within the outer jacket, and need to start with a fresh cut again.
Strip the wires so that you have adequate room to attach them together. Here's what you'll have
Plug Cord: W, Blk, Grn
Ballast Extension Cord (the other half of the cord): W, Blk, Grn
Ballast: B, Red, Blu
Ignitor: Red, W, Blu
Socket: W, Blk
Here's how to connect the wires to eachother. After properly attaching the ground wire to a good grounding place (if you don't understand this, read up on it), you can get your other wires connected. This is where you'll want to get your plug wire in through one hole of the electrical box and get your extension cable up into the other hole. (It's a box. I know, punch the hole out with a screwdriver.
 )
)
-Extension cord and socket: attach the white of the cord to the white of the socket. Attach the black of the cord to the black of the socket.
-Extension cord, plug cord and ignitor: attach the white of the extension cord to the white of the ignitor and the white of the plug cord.
-Extension cord, ballast and ignitor: attach the black of the cord to the blue of the ballast and the blue of the ignitor.
-Ballast and ignitor: attach the red to the red.
-Ballast and plug cord: attach the black of the ballast to the black of the plug cord.
Screw the lamp into the socket.
Do a little dance of luck and joy.
Here's a couple of examples of wiring found inside 150w hps
OK and for those who have a capacitor in the system here's a wiring diagram for that.

 Metal Halide
Also worth noting is that most ballasts come with the wiring diagram on the back like so -

Hope thats a help

We've got the ballast (deceptively heavy):

We've got the ignitor:

And we've got the socket:
You've also got your plug cord and your extension cord.
A note before we start to put the wires together: take your time with the next few steps. Ensuring that your wires are securely twisted together and that the wire screws are on securely is very important.
I recommended 8 ft. before as you can use the plug to attach to the ballast and use the remaining cord to extend the length from the ballast to the socket.
First, you will want to measure how much distance you will need from your plug, to where your ballast will rest it's electrical box. If you are good at stripping wires then you know how much more space to give yourself. If you aren't, give yourself plenty of extra cable: you may accidentally cut into the cables within the outer jacket, and need to start with a fresh cut again.
Strip the wires so that you have adequate room to attach them together. Here's what you'll have
Plug Cord: W, Blk, Grn
Ballast Extension Cord (the other half of the cord): W, Blk, Grn
Ballast: B, Red, Blu
Ignitor: Red, W, Blu
Socket: W, Blk
Here's how to connect the wires to eachother. After properly attaching the ground wire to a good grounding place (if you don't understand this, read up on it), you can get your other wires connected. This is where you'll want to get your plug wire in through one hole of the electrical box and get your extension cable up into the other hole. (It's a box. I know, punch the hole out with a screwdriver.
-Extension cord and socket: attach the white of the cord to the white of the socket. Attach the black of the cord to the black of the socket.
-Extension cord, plug cord and ignitor: attach the white of the extension cord to the white of the ignitor and the white of the plug cord.
-Extension cord, ballast and ignitor: attach the black of the cord to the blue of the ballast and the blue of the ignitor.
-Ballast and ignitor: attach the red to the red.
-Ballast and plug cord: attach the black of the ballast to the black of the plug cord.
Screw the lamp into the socket.
Do a little dance of luck and joy.
Here's a couple of examples of wiring found inside 150w hps
OK and for those who have a capacitor in the system here's a wiring diagram for that.

Wiring Diagram
 HPS
HPS
(High Pressure Sodium)
Wiring diagram
Wiring diagram
Also worth noting is that most ballasts come with the wiring diagram on the back like so -
Hope thats a help
el seca leche
Well-Known Member
Those are the procedures to remoting your ballast............
but I didn't do all that, I just kept it simple
but I didn't do all that, I just kept it simple