New 200 watt vero 29 build

Dr.StickyFingers

Well-Known Member
LOL !!!

Wait till you encounter Guod ,for example .......
:lol::lol::lol::lol::lol:
I'm an angel ....


Cheers.
Ehh hopefully he didn't see this post then XD just kidding..

Alright well im paranoid now in a good way... I'll earth the shit out of everything that's metal then. Hell Ill even encase the chain hanging the light in rubber or heatshrink tubing or w.e.

I guess I'd rather overkill it then get shocked... having been tased is enough to never want to get shocked in any way or form again for a lifetime.

Thanks for the knowledge

I'll update this thread in a week or 2 once everything gets here and i start building for anyone who's interested
 

robincnn

Well-Known Member
Aim for earthing the large structure parts firstly i.e. heat sink (s),rods ,bars ,chains ,facets ,panels ,etc ...
Then by using "bridge wiring " ,-a single piece of wiring that connects two parts - you might want to connect
any smaller metallic parts that are not contacting the earthed structure otherwise ,cause they are epoxy glued and not riveted or screwed on place .You never know ...
Alright well im paranoid now in a good way... I'll earth the shit out of everything that's metal then.

:o
I was about to buy a class I , HLP80H-42
I don't feel so good now. I might just go with Class II
 

Getgrowingson

Well-Known Member
You don't need to encase the chains. If your using aluminum angle ect that's held together with screws they will be at the same "potential" therefore they are bonded as we say in North America. So make sure all metallic parts are bonded and ground the heatsink using the green wire from your A/C supply. Make sure even the driver if it is metallic is also bonded and you will be fine. No need to be paranoid just conscious of all electrical connections. Make sure they are insulated with heatshrink tubing or something like that. Good luck G
 

stardustsailor

Well-Known Member
:o
I was about to buy a class I , HLP80H-42
I don't feel so good now. I might just go with Class II
My dear child ....


Stop for a moment and think .....

Better heat convection vs isolation class ....

There's plenty of things that you can do to safely install an class I device
into a metal structure ,and further optimise isolation and earthing ,to make a
Class I device operate as safely as possible .....

Maybe aliens could electrocute you at such case ,but not the driver(s) ...

From the other hand ,not much could be done to better improve the heat convection
with air ( = better operation ,more efficient performance & longer service life ) ,
of a plastic encased LED driver of Class II ....

Still there's more weight on the Class I ,but better RFI/EMI protected ..
Gain there ,lose there ...

Make the best choice ...

Keep calm and count 'n' weight all the cons and pros ...


Cheers.
:peace:
 

stardustsailor

Well-Known Member
:o
I was about to buy a class I , HLP80H-42
I don't feel so good now. I might just go with Class II
BTW ..
The HLP -80H-42 ,are Class I ,open frame drivers ...
Pretty " Hardcore " I should say ...
Not for begginers for sure ...
They are great as tasers ,too ..
Tace extra caution ....


(...)
Class I appliances, the protection is provided by a combination of basic insulation
and the use of electrical earth. These appliances must have their chassis connected
to electrical earth by an earth conductor (coloured yellow/green in most countries,
green in the U.S., Canada and Japan). The failure of an electrical appliances basic
insulation may cause a metal chassis to become “live” at full mains voltage. This
failure could occur through faults such as the incorrect fitting of the flexible chord, or a
short-circuit caused by a stray strand of wire bridging the gap to the chassis.
To safeguard against electric shock from metal cased electrical appliances, the metal chassis or
case or any exposed metal of appliances (other than double-insulated items) must incorporate
a Protective Earthing conductor connected to the Earth pin of an approved three pin plug
incorporating an “Earth” terminal. The Earth pin is longer than the other two pins so that it
is first to make contact and the last to break contact when the plug is withdrawn.
By connecting to the metal chassis of the appliance, the Protective Earth wire keeps all
this metal at Earth potential. What this means is that it is impossible to get an electric shock
even when the chassis is connected directly to the live voltage. A fault in the appliance which
causes a live conductor to contact the casing will cause a current to flow in the earth
conductor. This current should trip either an over current device (fuse or circuit breaker) or
a residual current circuit breaker which will cut off the supply of electricity to the appliance.
In practice, the most common instance of faulty earthing are:

•Earth connections broken accidently or
corroded through age.
•Earth connections incorrectly made.
•Earth connections not made at all.
•Earth connection removed for some
specific purpose and not reinstated.

---------------------------------------------------------------------------

In a Class II appliance, the user is protected by at least two layers of insulation between the
current carrying parts and any metal accessible to the user.
•Basic Insulation, and
•Supplementary Insulation
For this reason, Class II appliances are also known as Double Insulated appliances. They
do not require an Earth connection. In Europe, a double insulated appliance
must be labelled “Class II”, “double insulated” or bear the double insulation symbol (a square inside another square)
f the basic insulation or the supplementary insulation breaks down, it will not result in an
electric shock risk. Protection will be afforded by the other system of insulation. The
accessible metal parts will become “live” only in the event of a breakdown of both insulation
systems. The probability of this occurring is very remote provided special care is taken
when servicing or repairing double insulated electrical appliances to ensure that both
insulation barriers remain effective. Class II electrical products may be any of the
following types:

Double-insulated electrical products which
comprise both basic insulation and
supplementary insulation. In other words,
there are two layers of insulation between
the live parts and accessible parts of this
type of product. In the case of products
with outer casing made from insulating
material, the casing will be ranked as one
of the required layers of insulation.

Reinforced-insulated electrical products
which comprise single layer of insulation
system to the live parts and provide a
degree of protection against electric shock
equivalent to double insulation.

Electrical products which have durable
and substantially continuous enclosure
made of insulating material. All metal
parts, except small parts such as
nameplates, screws and rivets which are
separated from the live parts are enclosed
by insulation at least equivalent to
reinforced insulation. This type of
electrical products is called insulation-
encased Class II products.

Electrical products which have
substantially continuous metal enclosure
in which double insulation is used
throughout, except for those reinforced-
insulated parts where the application of
double insulation is obviously
impracticable. Such electrical products are
called metal-encased Class II products.

-----------------------------------------------------

3 : Are Class I and Class II appliances just
as safe?

As both have two levels of protection built in, they are both safe for general use. However
with a Class I appliance, one of the layers of safety is provided by the earth connection. For
this to be effective, the wiring in the building has to be inspected regularly to check that the
Earth in the mains socket is correctly taken to the local earth potential. Class I appliances
depend on the external wiring in the building to fully provide the 2 levels of protection.
Class II appliances however always provide 2 levels of protection irrespective of the status of
the wiring installation. Both layers of protection are built into the design making
Class II appliances a lot safer than Class I appliances

http://www.vitecpower.com/wp-content/uploads/2012/05/Excelsys_ApplicationNoteAN1102-ClassIvsClassII.pdf


Cheers
 

Dr.StickyFingers

Well-Known Member
You don't need to encase the chains. If your using aluminum angle ect that's held together with screws they will be at the same "potential" therefore they are bonded as we say in North America. So make sure all metallic parts are bonded and ground the heatsink using the green wire from your A/C supply. Make sure even the driver if it is metallic is also bonded and you will be fine. No need to be paranoid just conscious of all electrical connections. Make sure they are insulated with heatshrink tubing or something like that. Good luck G
Well I think using wagos and the ez mate connectors the only exposed metal will be the heatsink which is why I thought all I needed to do was earth that and then since everything else metal is in contact with the heatsink it'd be fine

There's no angles/frames it's just one large heatsink that has all the cobs
 

coolbreez1

Well-Known Member
In most cases it seems like most shorts would be caused by wiring things together in a sloppy way, little strands not in a connection, or something wired in correctly. OR when something has been moved carelessly and wires have come undone.

MY stupid question would be. If i just build the whole damn thing with metal, metal frame, heat sinks, class one power supplies, metal. and the entire structure is all metal contacting metal, held together with screws of Kapton tape, all metal contacting metal, and the Class I power supplies are properly connected to ground then, the entire structure should be grounded?
 

Dr.StickyFingers

Well-Known Member
In most cases it seems like most shorts would be caused by wiring things together in a sloppy way, little strands not in a connection, or something wired in correctly. OR when something has been moved carelessly and wires have come undone.

MY stupid question would be. If i just build the whole damn thing with metal, metal frame, heat sinks, class one power supplies, metal. and the entire structure is all metal contacting metal, held together with screws of Kapton tape, all metal contacting metal, and the Class I power supplies are properly connected to ground then, the entire structure should be grounded?
That's why I was thinking wouldn't it be fine to just ground one part as long as it's in contact with all the other.

I thought grounding/earthing pretty much serves the same purpose as a neutral wire to take the of flow electricity back tripping the breaker, the only difference being that the ground is a back up in case a wire comes loose and contact with the rest of the light electrifying it the ground would serve the purpose of a backup neutral. However my understanding of electrics is shit and if I just spewed out shit I apologize
 

stardustsailor

Well-Known Member
That's why I was thinking wouldn't it be fine to just ground one part as long as it's in contact with all the other.

I thought grounding/earthing pretty much serves the same purpose as a neutral wire to take the of flow electricity back tripping the breaker, the only difference being that the ground is a back up in case a wire comes loose and contact with the rest of the light electrifying it the ground would serve the purpose of a backup neutral. However my understanding of electrics is shit and if I just spewed out shit I apologize
Well ,ain't exactly like that ....

In AC from mains ,in the US for example ,the Root Mean Square (say something like the "average" ) difference of dynamic potentional between Neutral and Line/Live is ~ 110 Volts ...
You can say that the Neutral is of 0 V (ain't really ) and the LIne/LIVe has a votage potentional with the former .
Actually the polarity changes 60 times per second. Half of them it will be of "positive dynamic potentional " (aka Voltage )
and half of "Negative dynamic potentional ",in regard to the Neutral .....

"Earth " wire has a difference in dyn. potentional with both Neutral and Line/Live....
Either of them shorting with a good EARTH ( = under 50 Ohms total resistance from case of device /appliance to the earth/soil ) ,it will cause any/some circuit breakers or fuses in the net to trip ,due to high current -remember the low resistance of Earth net should have under proper situations ....

Earth itself now ,has a dynamic potentional with any possible DC circuit around ....
Especially when switching PSu are around ...Like LED drivers ...

A high quality Switching CC LED driver ,has in plenty of sites ,lots of " noise bypassing " capacitors ,
which they "damp" in the Earth wire / net ,lots of EMI and other types noise ...
In real world ,that translates to AC voltage of high frequency (due to switching operation ) ..

An Earth net/wire shorting with any DC circuitry ,will "contaminate" the DC circuit with AC noise of
considerable dynamic potentional difference to both the +VDC and 0 VDC (ground ) nets
of the DC circuit ...
Lot's of weird things will start happening ...
Like a switching DC psu to destroy the pixels of a LCD screen ,which is connected to an Arduino ...
A sudden "spike" of AC noise which had contaminated the DC circuit ,due to EARTH & GROUND shorting ,
fried up the sensitive +3.3 VDC internal circuits of the small poor NOKIA 5110 LCD display screen ...

Earth wire in AC is used for security - if needed -and " damping all the AC "trash" ..
When AC wiring is present within a metallic structure ,better to connect the whole structure
with Earth ...
BTW ...
Screws and rivets ,they both conduct electricity ....
;)

Also ....You have "transparent" anodised aluminium ..
(Especially the different profile bars ,angles ,rods ,tubes ,etc ..)
Many of them sold ,are not having "raw " aluminium surfaces ,
but they are anodised ...You can't see it easily ,but it's there ...
Anodised surfaces do NOT conduct electricity ....
Just keep in mind ,that small "detail" ,there ...
;)


Cheers.
:peace:
 

robincnn

Well-Known Member
Also note the meanwell metal cased power supply like HLG series have anodized outer aluminum case that does not conduct electricity.
if powersupply mounted to Hestsink (HS) with screw do not assume hestsink is grounded.
the few tiny hex shape on bottum side of power supply or screws might ground heatsink from powersupply. Good to check. Even better if you connect HS to ground with a wire instead of assuming power supply body in contact with HS will groud HS
 

Dr.StickyFingers

Well-Known Member
Also note the meanwell metal cased power supply like HLG series have anodized outer aluminum case that does not conduct electricity.
if powersupply mounted to Hestsink (HS) with screw do not assume hestsink is grounded.
the few tiny hex shape on bottum side of power supply or screws might ground heatsink from powersupply. Good to check. Even better if you connect HS to ground with a wire instead of assuming power supply body in contact with HS will groud HS
Right between you and SDS its making sense. So I should be lright with my diagram. Both the power supply and HS each individually connected by wire to the grounds via a wago 3. The power supply will be grounded as well as the HS which contacts any other metal parts in my build... thank guys I'm a bit more confident of not electrocution myself :)
Maybe I'll move away from building smaller lights :)
 

stardustsailor

Well-Known Member
About the HLP series ...
HLP series.JPG


1 ) Two of the four mounting holes ,HAVE to be EARTHED.BOTH !
Oneof them at the AC side is directly connected with the FG pin ( #6 pin ) ,
so if the earth connects to the mounting screw ,the #6 pin may not be connected to Earth.

2) In the red areas are the pin types the driver needs .
Personally I change them with some other equivalent type made from Molex .
Easier for me to do so ,than utilising those JST-VHR connectors ...
Not so common connectors ...Not easy to find on the local electronics market ...

( With the aid of a thin flat screw driver ,the on-board plastic connectors are removed ,
while the pins remain soldered on board.From the replacement connector ,the pins are removed ,and the plastic part is inserted to the pins soldered on the board .With some-gentle- pushes with the screwdriver,the new plastic connector part is inserted in the place of the old one ...That for the on-board plastic connector parts ...No need to unsolder the whole connector.Leave the pins there ,slip off the plastic part,and replace with new one .
..)
449835332_515.jpg


3) Turn SVR1 totally to the end ,clock-wise.(green dot at the pic , as indicator of position )
2200 + mA output for the HLP-80H-42 , 1656 mA output for the HLP-60H-42 .


4 ) Turn SVR2 up to " 1 or 2 o' clock " position ( ~ 42 Volts for the HLP-x0H-42 )
If you turn SVR2 all the way to the max ,the driver operates as CV one and not as CC anymore


P.S.
As you may 've understood ,I'm a fan of a certain "policy",
quite uncommon between LED grow light DIYers ...
I prefer each COB to have it's own driver and
not have a single driver to drive more than one COB.
I've my reasons doing so ....
Yeap ,maybe not most efficient or cheap method ...
But ...the are some serious pros around ,too ...

The HLP series are made ...
It's like the makers had the VERO 29 in mind as a possible "load " for the drivers ..
They pair awesome with Vero 29s ....
Made for each other ...
 
Last edited:

Getgrowingson

Well-Known Member
In most cases it seems like most shorts would be caused by wiring things together in a sloppy way, little strands not in a connection, or something wired in correctly. OR when something has been moved carelessly and wires have come undone.

MY stupid question would be. If i just build the whole damn thing with metal, metal frame, heat sinks, class one power supplies, metal. and the entire structure is all metal contacting metal, held together with screws of Kapton tape, all metal contacting metal, and the Class I power supplies are properly connected to ground then, the entire structure should be grounded?
Correct
 

Dr.StickyFingers

Well-Known Member
About the HLP series ...
View attachment 3481700


1 ) Two of the four mounting holes ,HAVE to be EARTHED.BOTH !
Oneof them at the AC side is directly connected with the FG pin ( #6 pin ) ,
so if the earth connects to the mounting screw ,the #6 pin may not be connected to Earth.

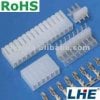
2) In the red areas are the pin types the driver needs .
Personally I change them with some other equivalent type made from Molex .
Easier for me to do so ,than utilising those JST-VHR connectors ...
Not so common connectors ...Not easy to find on the local electronics market ...

( With the aid of a thin flat screw driver ,the on-board plastic connectors are removed ,
while the pins remain soldered on board.From the replacement connector ,the pins are removed ,and the plastic part is inserted to the pins soldered on the board .With some-gentle- pushes with the screwdriver,the new plastic connector part is inserted in the place of the old one ...That for the on-board plastic connector parts ...No need to unsolder the whole connector.Leave the pins there ,slip off the plastic part,and replace with new one .
..)
View attachment 3481708


3) Turn SVR1 totally to the end ,clock-wise.(green dot at the pic , as indicator of position )
2200 + mA output for the HLP-80H-42 , 1656 mA output for the HLP-60H-42 .


4 ) Turn SVR2 up to " 1 or 2 o' clock " position ( ~ 42 Volts for the HLP-x0H-42 )
If you turn SVR2 all the way to the max ,the driver operates as CV one and not as CC anymore


P.S.
As you may 've understood ,I'm a fan of a certain "policy",
quite uncommon between LED grow light DIYers ...
I prefer each COB to have it's own driver and
not have a single driver to drive more than one COB.
I've my reasons doing so ....
Yeap ,maybe not most efficient or cheap method ...
But ...the are some serious pros around ,too ...

The HLP series are made ...
It's like the makers had the VERO 29 in mind as a possible "load " for the drivers ..
They pair awesome with Vero 29s ....
Made for each other ...
Right I plan on mounting the driver and fan to the heatsink as well via bolts and nuts. I get what you're saying but my goal was affordability and functionality while not shocking myself. And also I know this is going to probably annoy you but one wago 5 pin didn't have enough holes for 5 drivers and a power cord XD
 

robincnn

Well-Known Member
@stardustsailor
just read meanwell pdf. All drivers including HLP are class 2.
class 1 exceptions are hlg 150,185 and higher and some high power HVG
i wonder what is 'class 2 pass LPS' for HLP series
sorry i assumed hlp is class 1 previously

@Dr.StickyFingers
You can daisy chain 2x wago 5 pin to make a 10 pin with 8 usable points.
Your design and power supply is good too.
Sorry did not mean to highjack ur thread. Thought i will ask sds about hlp series since we were talking about class 1 drivers.
 
Last edited:

Dr.StickyFingers

Well-Known Member
@stardustsailor
just read meanwell pdf. All drivers including HLP are class 2.
class 1 exceptions are hlg 150,185 and higher and some high power HVG
i wonder what is class 2 pass LPS for HLP series
sorry i assumed it is class 1 on previously

@Dr.StickyFingers
You can daisy chain 2x wago 5 pin to make a 10 pin with 8 usable points.
Your design and power supply is good too.
Sorry did not mean to highjack ur thread. Thought i will ask sds about hlp series since we were talking about class 1 drivers.
Nah its cool, more knowledge.

Ya I was just just joking about that... I know there's ways I'm just too lazy so I went with one driver
 

stardustsailor

Well-Known Member
@stardustsailor
just read meanwell pdf. All drivers including HLP are class 2.
class 1 exceptions are hlg 150,185 and higher and some high power HVG
i wonder what is 'class 2 pass LPS' for HLP series
sorry i assumed hlp is class 1 previously

@Dr.StickyFingers
You can daisy chain 2x wago 5 pin to make a 10 pin with 8 usable points.
Your design and power supply is good too.
Sorry did not mean to highjack ur thread. Thought i will ask sds about hlp series since we were talking about class 1 drivers.
Class II my @$$ ...
Have one operating with load ,earthed
and with the upper / outer side of your fingers ( NOT the INSIDE one !! )
dare to touch lightly ,either of the heat sinks of the driver ...:fire:...

Disclaimer : I 'm not suggesting you, to do so ......Ok ?


See how "good" it feels the close encounters with a Class II appliance ?
LOL !!!

Sure it can help ,the next morning of a wild night ,having a hangover ...
Touch the driver (with the method explained ) and instantly your mood and state will change ...
LOL !!!

Nope,I seriously do not think that those HLPs are Class II devices ..
There has to be a mistake somewhere ...
I know by experiences ...Far too many times ,accidently "felt" the ..."force" .......:shock:..

Cheers.
:peace:
 
Last edited:

Dr.StickyFingers

Well-Known Member
20150820_155051.jpg
Haha did anyone else receive their stuff from heatsink usa wrapped up in old newspapers? Talk about being on a budget... no bubble wrap?
I just found this funny..

Anyways the driver came from mouser as well... now I'm just waiting on the Veros
20150820_155252.jpg
... much to my absolute stupidity I completely forgot about the 3 in 1 dimming function and I have no idea what to do with the dimming cord... looks like I'll have to read up on your post about dimming for a couple of hours SDS
 

robincnn

Well-Known Member
Im with ya Robincnn. He just talked me right of an open face driver.
I ended up going with the HLP80H open driver.
It works fine in enclosed designs as long as properly grounded. The connector and mounting the driver is also not easy.
Class 2 drivers are easy to mount and safer if you have open frame design.
 
Top