Banana444
Well-Known Member
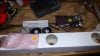
4 cxb 3590s 4000k 80cri actively cooled, driven by hlg320h36. Running them full power in flower, but i love that i can dim these drivers and run more efficient for veg.
Attachments
-
 7.6 MB Views: 173