1. You can clone from a flowering plant but it is more difficult to get it to root than taking one from a vegging plant.
The answer to difficult cloning is air layering.
Learn How to Air Layer
Daniel Overcash
When it comes to vegetative propagation, I naturally think of taking a plant cutting and rooting it in the ground or in some other media. But air layering is different: Its done aboveground while the propagule (a bud, tuber, root or shoot) is still attached to the parent plant.
Make a 1½-inch wound to start the air layering process.
Photo Credit: Daniel Overcash
Wrap the wound with sphagnum moss or soil, and cover it with plastic wrap.
Photo Credit: Daniel Overcash
After placing the soil and plastic wrap around the wound, tie a rubber band at each end to form an airtight seal.
Photo Credit: Daniel Overcash
Cover your airtight seal with aluminum foil to reflect the light.
Photo Credit: Daniel Overcash
As strange as the method sounds, this way of propagation has actually been practiced for centuries although its not too common because of the time it takes to grow a cutting. Typically the best time to air layer is in early spring on the past years growth. Many times the cuttings are ready by fall, but some cuttings may take two growing seasons to root.
You may need a lot of patience with this technique, but for those hard-to-root plants, air layering is a highly effective way to reproduce plants. Whats more, its not too difficult! All you need is a little patience, a little work and a few simple supplies:
- A sharp knife
- Sphagnum moss (or potting soil in a pinch)
- Plastic wrap (the kind from your kitchen)
- 2 rubber bands cut in half
- Aluminum foil
- Rooting hormone (optional)
Once youve got everything handy, just proceed in a step-wise fashion:
Step 1: After selecting the branch you want to propagate from, come down 12 inches from the tip of the branch and make two parallel cuts 1½ inches apart with a sharp knife. Dont cut through the branch! Just cut deeply enough so the outside bark peels off. (What youre going for is an exposed wound.)
Step 2 (optional): If youd like, add a little rooting hormone to the wound to speed up the rooting process.
Step 3: Wrap the wound with moist sphagnum moss (or potting soil), then cover it with plastic wrap to form an airtight pouch. (Note: This is the hardest step and it can be amusing just trying to keep the moss from falling off the limb while getting the plastic wrap securely around it. To make the task a bit easier, I like to place the moss or potting soil in the plastic wrap first, then wrap both around the wound at the same time.)
Step 4: Tie the rubber bands around the ends of the plastic wrap. (So now you should have a ball of moss wrapped in plastic wrap around the wound.)
Step 5: Cover the plastic wrap with aluminum foil. The foil protects the wound from sunlight in two ways: First, it prevents sunlight from destroying the hormone that causes rooting. Second, it reflects sunlight and keeps the rooting area from getting too hot.
And then you wait (and wait). To determine if a cutting is fully rooted, periodically check it by removing the aluminum foil to see if roots have grown to the edge of the plastic.
Step 6: Once youve determined that the cutting is fully rooted, its time to plant your baby plant. First you need to cut the baby off of the mother plant below where your pouch was located. Then plant your new plant in a pot using the appropriate potting mix, or plant it outside in the right spot for that species particular sun and drainage requirements.
Step 7: Dont forget to maintain your baby plant! Small newly rooted plants should receive far less sun exposure while initially growing than the mother plant requires, so do provide it some shade. And keep your little plant well-watered but also well-drained until its established. Consider fertilizing lightly as you would the mother plant.
 for free!
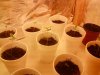
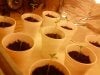
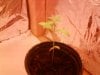
  these are my babies right now. My lighting sucks really bad because im poor lol but hopefully after this grow i will have enough to buy better growing medians.