Someguys Perpetual Parabolic SCROG Cabinet grow (trying to actually keep a journal)

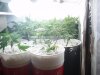
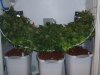
OK!! Im back. So here starts the updates. This is from the end of wk 4 going into week 5. I also started using BMO organics in combo with some of my other stuff.
attachment.php

attachment.php

attachment.php

attachment.php

attachment.php

attachment.php

attachment.php

attachment.php

attachment.php

attachment.php

attachment.php

attachment.php
 

Attachments

  • P1010001.jpg
    P1010001.jpg
    27.4 KB · Views: 520
  • P1010002.jpg
    P1010002.jpg
    45.8 KB · Views: 520
  • P1010008.jpg
    P1010008.jpg
    66.8 KB · Views: 521
  • P1010003.jpg
    P1010003.jpg
    62.6 KB · Views: 521
  • P1010006.jpg
    P1010006.jpg
    70.8 KB · Views: 520
  • P1010016.jpg
    P1010016.jpg
    48.8 KB · Views: 524
  • P1010005.jpg
    P1010005.jpg
    42.5 KB · Views: 520
  • P1010004.jpg
    P1010004.jpg
    101.1 KB · Views: 520
  • P1010010.jpg
    P1010010.jpg
    84.8 KB · Views: 520
  • P1010011.jpg
    P1010011.jpg
    57.5 KB · Views: 521
  • P1010013.jpg
    P1010013.jpg
    68.4 KB · Views: 521
  • P1010014.jpg
    P1010014.jpg
    73 KB · Views: 519
Here is from early week 6. This brings us up to date on picture updates and we have one coming this weekend that will be end of week 6 / start of week 7. I will probably take them 9 weeks or so. Here is the Parabolic 400 cabinet, Enjoy:


attachment.php

attachment.php

attachment.php

attachment.php

attachment.php

attachment.php

attachment.php

attachment.php

attachment.php

attachment.php

attachment.php

attachment.php
 

Attachments

  • 4.jpg
    4.jpg
    69.7 KB · Views: 516
  • 3.jpg
    3.jpg
    71.8 KB · Views: 521
  • 2.jpg
    2.jpg
    56.5 KB · Views: 530
  • 1.jpg
    1.jpg
    51.5 KB · Views: 514
  • 5.jpg
    5.jpg
    68.8 KB · Views: 617
  • 6.jpg
    6.jpg
    69 KB · Views: 531
  • 7.jpg
    7.jpg
    58.4 KB · Views: 520
  • 8.jpg
    8.jpg
    66.8 KB · Views: 516
  • 12.jpg
    12.jpg
    56.4 KB · Views: 516
  • 11.jpg
    11.jpg
    80.3 KB · Views: 515
  • 10.jpg
    10.jpg
    56 KB · Views: 514
  • 9.jpg
    9.jpg
    68.3 KB · Views: 514
Here are the shots for week six in the flouro flower cabinet:

attachment.php

attachment.php

attachment.php

attachment.php

attachment.php

attachment.php
 

Attachments

  • 24.jpg
    24.jpg
    75.8 KB · Views: 513
  • 23.jpg
    23.jpg
    62.7 KB · Views: 515
  • 22.jpg
    22.jpg
    70.4 KB · Views: 513
  • 21.jpg
    21.jpg
    43.8 KB · Views: 514
  • 25.jpg
    25.jpg
    69.9 KB · Views: 511
  • 26.jpg
    26.jpg
    68.8 KB · Views: 513
Here are the clones we took a while ago. They are transplanted into 64oz cups and well on their way. The bush in the back is still doing awesome. It will be ready for flower right after the ones in the flouro cabinet are done.

attachment.php

attachment.php

attachment.php
 

Attachments

  • 33.jpg
    33.jpg
    71.5 KB · Views: 512
  • 32.jpg
    32.jpg
    56.1 KB · Views: 514
  • 31.jpg
    31.jpg
    53.9 KB · Views: 512
Looking great SG.
Way to fill out a space mate.
Nugs are looking fantastic, great pics.
+ rep when I can ;)
 
Looking great SG.
Way to fill out a space mate.
Nugs are looking fantastic, great pics.
+ rep when I can ;)

Thanks buddy, Im getting pretty happy right now. I'm doing gravity all this week and next then flushing out. I kinda play it by ear, but this batch seems to be doing really well despite a few spikes into the 90s. :-O
 
Hey SG I have a few things I've been meaning to ask you.
I noticed when you did your clones you packed perlite around the cubes.
I was wondering why you do this?
Does it help in some way?
Also how do you water your clones?
How long before you see roots normally?

Just interested mate.
 
Hey SG I have a few things I've been meaning to ask you.
I noticed when you did your clones you packed perlite around the cubes.
I was wondering why you do this?
Does it help in some way?
Also how do you water your clones?
How long before you see roots normally?

Just interested mate.

Well... since you ask :-)

I kinda use that whole Tupperware with perlite as a hempy bucket. I never water the rock wool directly and the perlite around the sides allows the roots to grow without getting air pruned at the sides of the cubes. I find that it helps for the cube to be moist but not wet. With the cube sitting just about a 1/2" above the res of the hempy bucket it maintains that moisture level. The roots grow uninhibited and I think they take to transplant quicker. I get roots within 10days coming out of the cube. A heavily rooted cube in two weeks or so. I find progressive increase in container size works best for me and allows me to control how much growth I get at different stages. Although... Ive had some huge plants in 64oz cups...LOL

I also really like topping and LST as they keep the plant low and create a lot more available bud sites.

Someguy,
I do the same thing with my clones once i notice root growth coming from the cubes. If you bury them it also gives you a jumpstart on the time it takes to hit the rez.
when you transplant, hold the cube level with the top of the cup, so the roots dangle inside the cup above the mix.
Backfill around the roots, up to the cube, and bury part of the cube. It makes a runoff zone, so the water doesn't lay around the cube making it too wet.
I notice almost NO transplant shock, or stop of growth by putting the roots directly in the rez, from transplant.

HEMPY ROCKS!!!
 
Great job and thanx for the new pics . And yes I have been subscribed , and yes plus rep . We have a short head hiegth in our grow room as well . It is 6'5" , so we do have more than a closet . I am guessing short bushy plants are best in our situation . What strain works best in these conditions ? Out of ours I think Blue Dream is working the best right now .
 
I find that if I manage it right almost any strain could be good under the screen. Its a great way to have big plants with a low profile.
 
Here it is about 3/4 days into week 7. These will go till done... that will probably be about 9-10 weeks. These are the shots of the parabolic 400w hps scrog Enjoy the pics :-)

attachment.php

attachment.php

attachment.php

attachment.php

attachment.php

attachment.php

attachment.php

attachment.php

attachment.php
 

Attachments

  • 1.jpg
    1.jpg
    57.8 KB · Views: 469
  • 2.jpg
    2.jpg
    78 KB · Views: 468
  • 3.jpg
    3.jpg
    75.8 KB · Views: 467
  • 4.jpg
    4.jpg
    62.6 KB · Views: 460
  • 8.jpg
    8.jpg
    58.9 KB · Views: 465
  • 7.jpg
    7.jpg
    82.2 KB · Views: 462
  • 6.jpg
    6.jpg
    87.1 KB · Views: 464
  • 5.jpg
    5.jpg
    84.2 KB · Views: 465
  • 9.jpg
    9.jpg
    72.9 KB · Views: 456
Here are the shots of the 220w compact t-5 fluorescent cabinet. :)

attachment.php

attachment.php

attachment.php

attachment.php

attachment.php

attachment.php

attachment.php
 

Attachments

  • 14.jpg
    14.jpg
    50.8 KB · Views: 455
  • 13.jpg
    13.jpg
    48.4 KB · Views: 457
  • 12.jpg
    12.jpg
    55.8 KB · Views: 458
  • 11.jpg
    11.jpg
    62.8 KB · Views: 456
  • 15.jpg
    15.jpg
    76.7 KB · Views: 458
  • 16.jpg
    16.jpg
    80.1 KB · Views: 458
  • 17.jpg
    17.jpg
    82.6 KB · Views: 456
Back
Top