spida
Well-Known Member
K1ng - Damn, why you gotta make me read all that? Haha. Thanks for advice. I think I have the same light/moisture/ph meter as you. Mine cost 7 as well. I had my moisture between moist and dry, but it was looking wet so better to underwater then to overwater. I can always add more later if needed. I have big bloom, but its MG. I also have schultz which is 10-15-10. I can look up the big bloom specs later I'm too lazy right now. I have everything already to go though.
Bonz - Thanks for advice. I decided not to get any run off, it seemed like overwatering to me, so I just got it moist, and then once i planted seeds I watered it in with a tablespoon of water.
GanjaLova - I have a total of 5. Two of them are in MG soil, because I was trying to copy after the book of Buds for Less. The other 3 are in kellogs soil whatever the hell that is, and it has the bat guano, worm castings, etc already mixed in it. This is my first grow, going to see what works for me and what doesn't. I'm going to do different things with each plant. I have 1 of each type of soil on a seedling heat pad, and the other 3 not. All have equal light though. I'm going to see what works best for me.
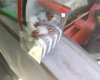
UPDATE: Seeds are all sprouted, but I'm scared one or two over-sprouted. They had brown tips on part of the root, but I don't know how to explain it. I have pictures of everything so far, but none of the seeds. I don't have steady enough hands to take that clear enough. So I planted all 5, and watered them in, and got it moist. Right now, I have them just sitting in my closet under 2 40watter cfl's, but I will add much more light in later. This is a temporary set-up until tommorrow when I build my box. So don't say OMG that looks so unsafe, blahblahblah. Hopefully in a few days, I will have 5 little seedlings.") I am going to water once a day until they sprout, but only about 2-3 tablespoons each, and right above the seeds. Advice/Suggestions. Pics are attached.
I am going to water once a day until they sprout, but only about 2-3 tablespoons each, and right above the seeds. Advice/Suggestions. Pics are attached.
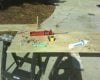
Picture 1 - Seeds with tap root coming out sitting on paper towel.
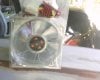
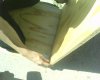
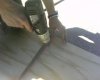
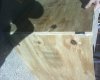
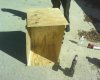
Picture 2 - Current set-up until tomorrow. That reflector actually makes the light increase quite a bit.. I put my light measure under it and then put it under the cfl without, and the light differences we're pretty amazing.
Bonz - Thanks for advice. I decided not to get any run off, it seemed like overwatering to me, so I just got it moist, and then once i planted seeds I watered it in with a tablespoon of water.
GanjaLova - I have a total of 5. Two of them are in MG soil, because I was trying to copy after the book of Buds for Less. The other 3 are in kellogs soil whatever the hell that is, and it has the bat guano, worm castings, etc already mixed in it. This is my first grow, going to see what works for me and what doesn't. I'm going to do different things with each plant. I have 1 of each type of soil on a seedling heat pad, and the other 3 not. All have equal light though. I'm going to see what works best for me.
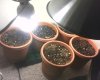
UPDATE: Seeds are all sprouted, but I'm scared one or two over-sprouted. They had brown tips on part of the root, but I don't know how to explain it. I have pictures of everything so far, but none of the seeds. I don't have steady enough hands to take that clear enough. So I planted all 5, and watered them in, and got it moist. Right now, I have them just sitting in my closet under 2 40watter cfl's, but I will add much more light in later. This is a temporary set-up until tommorrow when I build my box. So don't say OMG that looks so unsafe, blahblahblah. Hopefully in a few days, I will have 5 little seedlings.
Picture 1 - Seeds with tap root coming out sitting on paper towel.
Picture 2 - Current set-up until tomorrow. That reflector actually makes the light increase quite a bit.. I put my light measure under it and then put it under the cfl without, and the light differences we're pretty amazing.
Attachments
-
 32.3 KB Views: 27
 -
 48.2 KB Views: 50
 Part 1